TO THE SHOP...

Saturday 29 August 2009

New images! Challenge 12 'Using Digi Papers.' A Special Sponsor & Winner of Ch11

4 new additions to the Bee Crafty shop!


Halloween Set
4 themed illustrations; ‘trick or treat,’ ‘fat bat, 'pumpkin’ & ‘mini monster’ PLUS ‘mini monster’ pattern paper! Each sent as a separate Jpeg for maximum versatility and just £1.99 for the set. Click here to go to the shop

Here's an example using the pumpkin illustration and Cupcake Cards & Crafts ‘Doodle Dots’
For the boys…

…and by the boys (I have my husband to thank for drawing this fabulous modern Dodge Challenge and he is primed to sketch others if there is a demand!)
Only 99p here

Something NewFolding Shape Card Template ‘Cupcake’

This versatile template comes as a PDF with 4 different versions. Just print, cut and decorate (you can also alter the size using Adobes select tools.)
Just £1.75 here

Have a look at these great examples by Trixi and Elaine;


Also available is the single cupcake illustration at just 75p here
Challenge 12 – ‘Using Digi Papers’
This fortnight we have the fantastic Cupcake Cards & Crafts ‘Digital Downloads’ as a sponsor
How to play:
You must use digi papers somewhere in your craft item
Any papercraft item is allowed but it must use digital papers AND as usual you must also use a digital image (it doesn't have to be a 'Bee Crafty' image, but I hope you'll be tempted to use my images!) Submit by Saturday 12th September (Midday UK) by posting on your blog and commenting below. The extra PRIZE this fortnight is some digi papers from Cupcake Cards & Crafts as well as one of Bee Craftys downloads! (See full rules to the right.)

The Bee Crafty Design Team have been lucky enough to use papers from Cupcake Cards & Craft this fortnight in addition to Bee Crafty images. Some of the DT had lots of prior experience using digi papers whilst others had none. Check out their great creations….

Guest Designer Sheri with her beautiful card using ‘Scribbles Digital Designers Mini Sets – Candy’ & ‘Whimsical Girl’

Christine’s delicate, pretty layered card using ‘My Lazy Sunday Digital Papers’ & ‘Fairy Angel Floating’

Dei’s charming card using ‘Scribbles Digital Designers Mini Sets – Olive’ & ‘Whimsical Girl Butterfly Catcher’

Lori created this stylish card using the ‘Doodle Dots Collection’ & ‘Seated Boy’

Kim’s bright, summery card uses ‘For the Colours of Life' & ‘Whimsical Girl Butterfly Catcher’

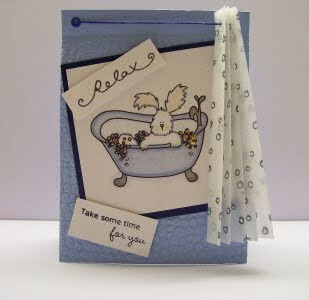
Sue’s bright, fun card uses ‘I Love Candy, The Papers’ & ‘Fluffy Bunny Pair’

Trixi has created a pretty calendar using ‘Doodle Dots Collection’ & ‘Whimsical Girl and Bird’

Here are a few great reasons to use digi papers;
# They are economical, once bought you can print as many times as you like
# You can resize papers and print the exact size you need to save waste
# You can modify areas to suit your design e.g., block off sections where a layer will be using ‘MS Word’
# They're always in stock and take up no room…great for last minute cards!
# If you have Photoshop or similar you can insert the patterns into images, ‘virtual paper piecing’
Also you can select the colours from the digi papers and insert them into an image so your creations have a great colour match
# You can alter the thickness / thinness to suit your project by printing on different paper / card

Winner of Challenge 11 is… Larissa and her gorgeous card (are you seeing spots!)

Saturday 15 August 2009

Challenge 11 'Just a bit more../OTT,' Winner of 10 and DT Inspiration

CHALLENGE 11 - THEME: 'Just a bit more...' or 'OTT' (over the top)
How to play:
Throw simplicity and reserve out of the window, we want a paper craft item (card or other) that leaps out at us and demands attention!
Here are a few suggestions, but how you interpret the theme is entirely up to you.
  • This item might be the sort you couldn't fit in an ordinary envelope or something that would have a very specific market. Go Over The Top!
  • Maybe focus on;
    Embellishments e.g., 'explosion of flowers,' 'loads of bling,' 'reams of ribbon,' 'multiple images'....
    Design e.g., 'excessively folded card,' 'incredibly involved project,' 'loads of layers'....
    Style e.g., 'super girly...butch...sweet...spotty...chintzy...'

Check out the great DT inspiration below!

Any papercraft item is allowed but it must have a bit of 'digital' somewhere (image, papers...) it doesn't have to be a 'Bee Crafty' image, but I hope you'll be tempted to use my images! Submit by Saturday 29th August (Midday UK) by posting on your blog and commenting below. The PRIZE is one of my downloads! (See full rules to the right.)

WINNER of Challenge 10 (colouring in) is the talented Jodi!


DESIGN INSPIRATIONS [using Bee Crafty digital images - available here]

Guest Designer, Lynsey - Why have one windmill when you can have three!


Sue - Make more of the image by creating a full blown 3D scene (love the curtain Sue!)


Trixi - 'Just a bit more...' dots, circles and two for the price of one bunnies! Gorgeous.


Kim - Busy up backgrounds with more blocks of patterned paper and layer up 'just a bit more...' than usual. Great job!


Dei - 'Just a bit more...' humour, cuteness, bursts of flowers and bunnies! I'm still smiling at this one Dei :)

Lori - ...loves dots and buttons... Use this challenge to pile on your favourite things!

Proof indeed that adding more elements to your creations doesn't necessarily mean they'll look like you dropped the contents of your craft box all over them!

We look forward to your creations and interpretation of the theme.

[If you didn't visit us last fortnight scroll back to check out the great tutorials]

Saturday 1 August 2009

Challenge 10 'Adding Colour to Images', Winner of 9, Colour Tips & Tutorials & A FABULOUS FREEBIE!

Grab a cup of tea and get comfy, this fortnight is a bumper post with the addition of some great tips and tutorials to inspire your use of colour on images, plus an exiting freebie as well as our regular challenge...read on and enjoy!

Challenge 10 'Adding Colour to Images'
How to play - You need to create any paper project where you add colour to an image (any means of adding colour is allowed...see our fab tips and tutorials below for ideas)
Any papercraft item is allowed but it must have a bit of 'digital' somewhere (image, papers...) it doesn't have to be a Bee Crafty image, but I hope you'll be tempted to use my images!
Submit by Saturday 15st August (Midday UK) by posting on your blog and commenting below.
PRIZE is one of my downloads! (See full rules to the right)

Winner of Challenge 9 - Sheri for her beautifully made card and gorgeous colours.
Beautifully coloured 'Whimsical Girl Butterfly Catcher' card by our Guest Designer this fortnight, Katy


COLOURING IN IMAGES - TIPS & TUTORIALS using images available from the Bee Crafty shop

Light, Wax Based Pencils (polychromes, Prisma, Koh-i-noor) & Monochrome by Trixi
1) Print image on premium quality thick smooth white card. 2) Spray with hairspray to set the ink and leave for a few minutes before applying colour. 3) Before starting to colour, decide where the light is going to come from and then think where on the image the shadows would be cast. In this example the light source is coming from the top right hand corner so the shadows would be cast towards the lower left side of the image. 4) Apply a light shade of your chosen colour to the image leaving the area you want to be lightest uncoloured. 5) Take a blending stump and dip it into an Odourless Mineral spirit (OMS) such as 'Sansador', apply to image, working in a circular motion to draw the colour out and blend it to remove harsh lines. 6) Apply more of the same colour to the areas you want to be darkest and blend until you get the desired effect.

Brush Pens by Dei Tips:
1) Scribble the colour on a spare piece of acetate or an acrylic block and pick it up with your brush from there OR if using watercolour paper use the pens straight onto paper, this allows you to move the brush around quite a bit (colour around the edges of the image and quickly work in with small circular strokes). 2) Always have a spare piece of paper at hand to try out the colour first. 3) Invest in a fine watercolour brush (not very expensive) or a water-tank brush. 4) It’s important not to use a brush that’s too wet – squeeze it gently between your fingers or dab on kitchen towel before use. Also make sure that the brush isn’t too dry as the bristles will separate. 5) Start with light colour as it’s easy to build up colour but almost impossible to take it away! 6) Work on small areas at a time. 7) Clean your brush if there’s too much colour on it – some areas where the light hits can be almost white. 8) Lastly – enjoy - I think colouring in is so therapeutic and it’s very hard to worry about something when you’re immersed in this task.

Don’t be afraid to mix and match - many of my images are coloured with brush pens, distress ink, watercolour pencils and promarkers.

PrismaColor Pencils by ChristinePrismaColors with Odorless Mineral Spirits (OMS). In my opinion, there is no right or wrong way to do this. Just do what works for you, this style is very forgiving and easy to fix most issues Materials: Prisma Color pencils, blending stubs, odorless paint thinner, a nail file and your image.
1) Outline all the areas that you wish to color - blue and gray are used here.
If using dark as well as light colors apply and blend all the light colors first then apply the dark colors very carefully. Be sure to use a very sharp pencil and of course, stay between the lines
2) Dip the blender stub into the OMS. I like to saturate the blender pretty well but I know others don’t. Using the blender, one section/color at a time, work in small circular motions to blend the color into the rest of the section to be covered. If you need more color, outline the image again and repeat the blending until you are satisfied.
I got my bunny a little darker than I wanted. I tried to remove a little color using some more OMS and a clean blender but it didn’t remove enough so I used a white pencil in the middle of the area and blended out to the edge.
Note: Blender stubs - always start with a clean point, to clean simply rub it on a nail file. You might want a sharp point or want it a little rounder, to sharpen simply file it with the nail file.
3) Add a little pink to his ears, feet, and nose, as well as a little more blue and some pink to the bubbles. Then blend all of the colors again. (When I have small areas like the nose and the dots on the feet, I simply touch the blender pen saturated in OMS to the spot.)
Note: I use a very sharp tipped blender (the tiniest one in the first photo) to rub on the black outlines that might have been smudged with pencil. Dip your blender into the OMS often when doing this
Now, it is all blended add color to the faucet and the feet of the bathtub with a silver pencil. Use a very fine point black felt tip to touch up some areas where the black outline doesn’t show through well. On this one, I re-outlined the nose. Smudge the blue line to represent the water and apply Stickles for some sparkle.

Watercolour by Christine
Materials: watercolor paints, water, your image and brushes
Apply the color in very thin layers - a thin layer of pink starting near where I would be applying the green. Then, when the pink is dry add the green.
It’s important to apply in thin layers. If not, the colors on your image will appear blotchy and inconsistent. (You can hardly tell in the photo but there is pink on all the petals and on the butterflies, as well as green on the stems.)
Now I have added the detail on the flowers and the butterflies. This is all the detail that I will add to the butterflies because, I printed the image twice so that I could color another set of butterflies and cut them out for layering.
Consider working on more than one image at a time, this way you can add a layer to first image and then add a layer to the second image while the first is drying.

Copics by Kim

1) Use the Marvy Memory Blender to go over the area to color, this “locks” in the area. (I have tried a few different white cardstocks and find that the colors bleed or spread when I use Copics. But coloring with this colorless blender first prevents that). 2) Next use a lighter color from a color group to go over the area just once, coloring in one direction only. 3) Then use a darker shade from the same color group to go around the edges or where the image will be shadowed. This depends on the direction of the lighting you want. 4) Then use another darker shade from the same color group and go over the shadowed side of the image. 5) Finally, use the original lighter color to blend, in circular motions the entire colored area, making sure the non-shadowed side is not too dark.

Oil Blending PrismaColor Pencils by Sue


Remember when using digi images the ink can sometimes bleed once you add colour....lightly spray your printed image with cheap hairspray and leave for a couple of hours, this usually sets the ink and then it will be fine to add whatever colouring medium you choose.
Materials: Desired Image, prisma pencils or polychromos pencils, paper blending stumps, blending oil (e.g., Sansodor.)
1) Colour in all the way around your image on the inside. 2) Then take your oil (I prefer sansodor) and your blending paper stumps and dip your paper stump into the oil and then in circular movements spread the colour over the image. Keep adding more oil if needed. 3) Then add more colour to the image around the edge and in the middle and repeat the blending with the oil. 4) You can keep repeating this until you have the desired colour or just add extra colour on certain areas. Leave chinks of white in the image for a professional look. The circular movement of the blending evenly distributes the oil and takes away any streaks or lines and gives a lovely fur effect finish in this example.

BONUS TUTORIAL - Z Cards by Sue
Materials: Ruler, Bone folder, 1 piece of white cardstock 4.5 inches by 11 inches,
1 piece of designer paper cut into 13 x 11 cm, 2 pieces of designer paper cut into 6.5 cm x 11 cm, nesties (optional), border punch (optional), blooms and embellishments(optional), sentiment stamp(optional)
1) Take your piece of 4.5 x 11 inch white cardstock and score it along the 11 inch edge at 5.5 inches and score again at 8.5 inches. 2) Now using your bone folder crease all your score lines and fold into a Z shape. 3) Take designer paper and adhere it to the 3 sections, I leave a fraction of white border around the edge. 4) Take your coloured image and add pink ink around the edge and distress then mount onto a square scallop nestie (size will depend on what size you create for your digi image.) 5) Adhere image to the front of your card. 6) Stamp your chosen sentiment and mount onto a nestie and add to the middle of your inside of your card.

Markers by Lori
Stampin' Up Marvelous Markers - Tempting Turquoise, Regal Rose, Certainly Celery & Close to Cocoa on Card 1. Ballet Blue, Pumpkin Pie, Green GaloreBashful Blue and Yo Yo Yellow on card 2. Also SU White Uniball Gel Pen for the polka dots

Paper Piecing / Layering by Bee Crafty & FREEBIE IMAGE & PROJECT!!
A great alternative to adding colour (as seen in Christines tutorial above and Sues gorgeous 'Love card' here)
This is my offering to illustrate 3D layering with an image;


1) Print your image on plain white card and cut to desired size.
2) Print image again (exactly the same size) on your chosen designer paper (ideally card or heavyweight paper).
3) Cut out the sections you want to layer.
4) Add any colour to the plain image e.g., purple to the sash
5) Then either glue the layers directly on top of the plain image (as in Sue’s pretty Love cards) OR use foam pads to add a more exaggerated 3D effect as in mine.
Note: If you are using digital background papers and are a reasonably confident using Photoshop or similar, you can add the pattern design to the image BEFORE printing (which is what I’ve done in your freebie) so saving paper.

Now for the FREEBIE - the image is from Bee Crafty and the gorgeous digi pattern is kindly donated by Cup Cake Cards & Crafts (visit their great shop and digi papers and come back here on the 29th to see more of their products used by our DT.)
Just take the tutorial image above, the one with the numbers 1 - 3 and three images, (right click and save to your computer.) Then insert it to a Word document and resize to your preferences, then follow the intructions 3 - 5 above.

If you post an item using this freebie on your blog or elsewhere please acknowledge and link back to both Bee Crafty (http://www.bee-crafty.blogspot.com/) and Cup Cake Cards & Crafts (http://www.cupcakecardcraft.co.uk/) and of course tell everyone to pop along and collect it for themselves!